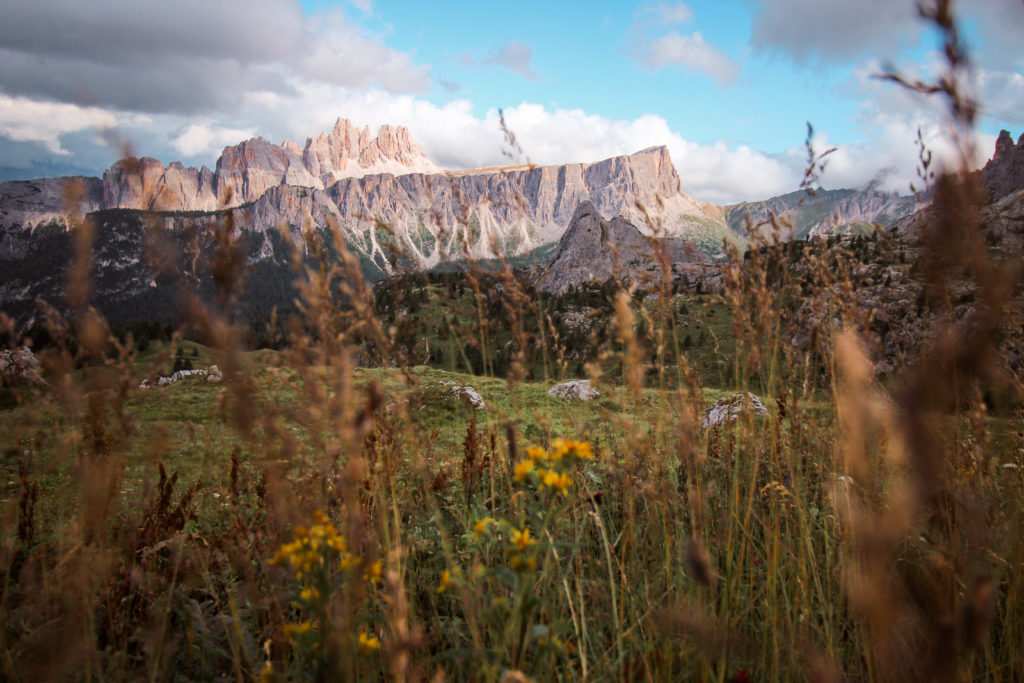
The Dolomites in north-eastern Italy are known for their stunning rock formations and crystal blue lakes. There are many ways you can experience the mountains, but one of the best is through one of the many multi day hikes.
There are many official trails – Alta Via routes – ranging from 6 to 13 days in length. We did Alta Via 1 – mainly because we didn’t know there were any others in the Dolomites. In any case, it turned out to be a great mistake because the route was breath-taking. Though long, the trails were fairly straightforward, well-signaged and easy on the eyes.
Alta Via 1 officially runs from Lago di Braies in the north down to Belluno in the south. It’s 120km long and can take about 10 days to complete with around 6,665m in total elevation gain. We hiked the full route up until Agordo where we ended the hike – many others did the same.
Trail Maps
You can access the trail maps for the route we did via Komoot. Alternatively, you can get paper maps in the towns. The trail is pretty well-signaged, but I wouldn’t go without a map of some sort especially if your plans get disrupted by poor weather.

Itinerary
If you want to hike from Lago di Braies to Agordo across 7 days, you can follow the below itinerary we did. The day-by-day descriptions are broken down with alternative routes where available.
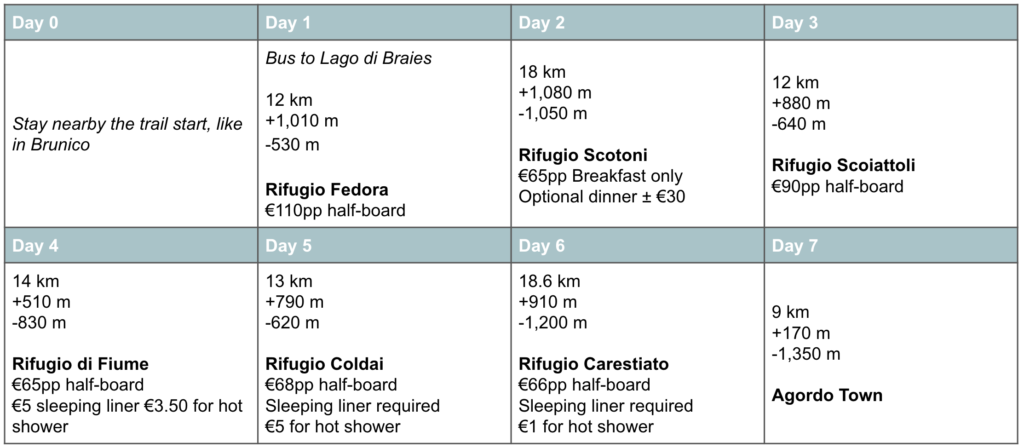
Day 0: The Night Before the Hike
Before starting the Alta Via 1, you’ll want to stay somewhere nearby the evening before so you can start hiking in the morning. We opted to stay in Brunico. The accommodation was more affordable than by the lake at the trail start and there’s a convenient train connecting Brunico to a bus that takes you up to the lake.
Day 1: Lago di Braies to Rifugio Fedora Velda
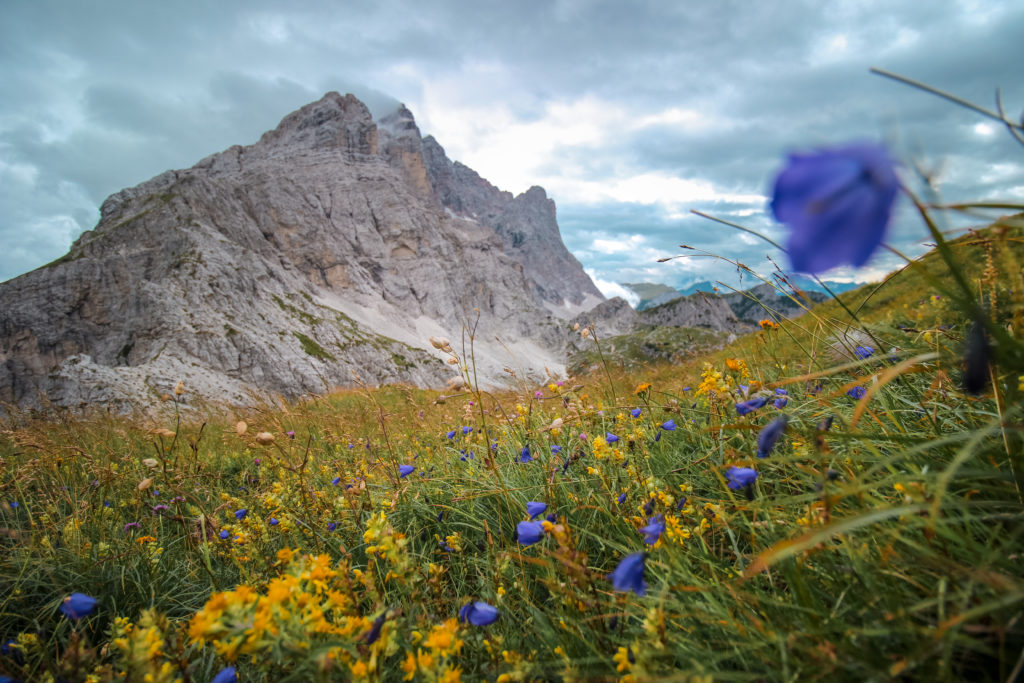
Day 1 is perhaps one of the most dramatic and scenic days of Alta Via 1.
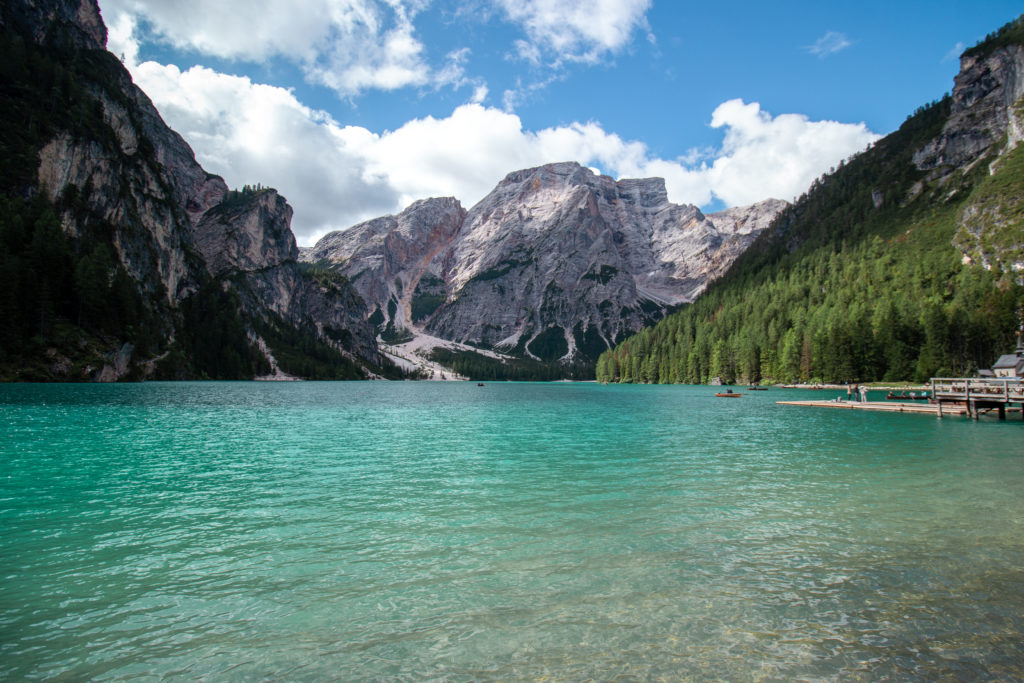
The first day of the trail, if you’re hiking from north to south, begins at Lago di Braies. You can either hike 10km here from the village (Niederdorf) or you can catch the bus (439 or 442).
The 439 leaves from the train station in Monguelfo. The 442 leaves from Dobbiaco Toblach to the east.
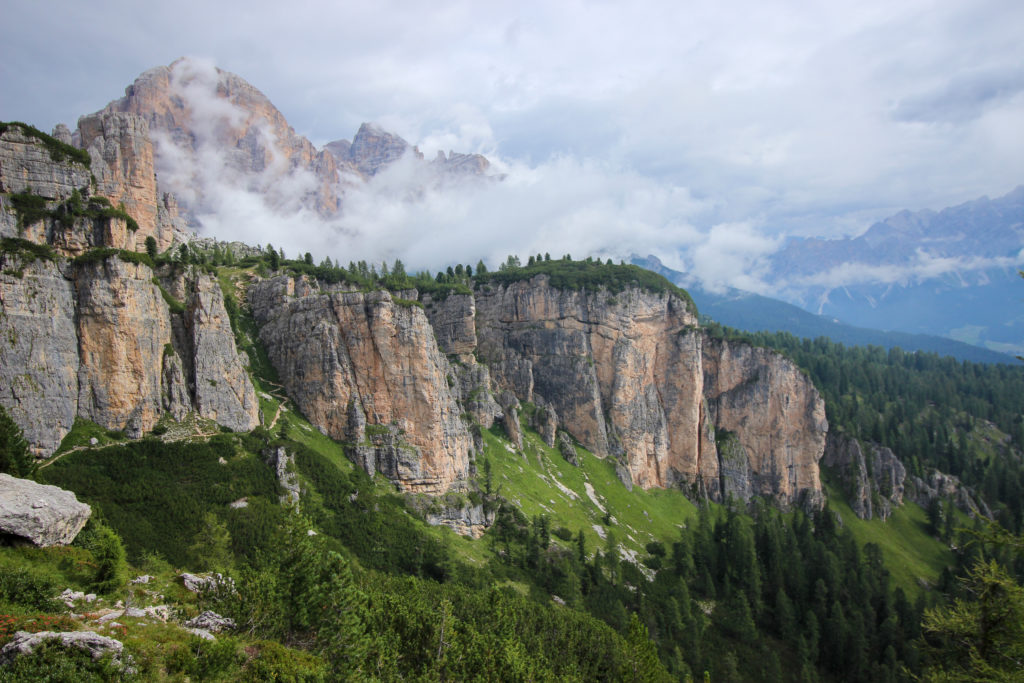
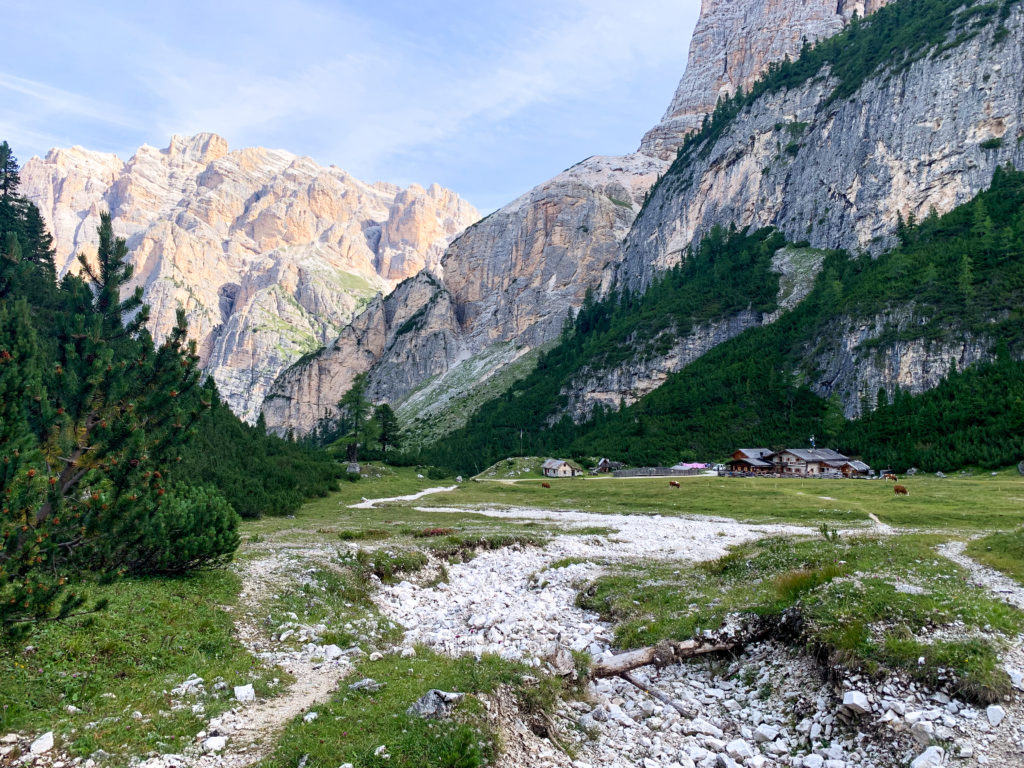
The hike starts off following the edge of the lake. There are two toilet opportunities along the way. The path then goes steeply uphill for quite a while before you get above the tree line. After a final climb you’ll reach panoramic views of a valley with Rifugio Biella below. You’ll pass by the Rifugio before you head downwards into a very dramatically beautiful valley until you come across Rifugio Sennes. You can stop here for the night.
Alternatively, do what we did and keep walking through a more forested area until you get to Rifugio Fedora Velda. This Rifugio is on the upper end of pricing (110 Euro per person for our room) but the food and accommodation are very good. We had a 4-bed room, no bunk beds, a private bathroom, fresh linens, a shared balcony and plenty of space to move around. The dinner was delicious and the breakfast buffet was filling. You can safely drink the water from the taps at this rifugio.
Day 2: Rifugio Fedora Velda to Rifugio Scotoni
Because of issues with finding available beds along the route, Day 2 ended up being a bit longer than the others at approximately 18km for the day.
Day 2 begins with a steep descent towards Pederü Berggasthaus along a gravel road. From there, there’s a moderate ascent that drags on for a while. At a fork in the road you can continue to Rifugio Fanes or split towards the lake and taste beer at one of the highest breweries in the Alps – Rifugio Lavarella. They also have great cake and Kaiserschmarren (pancake type thing).
After this pit stop, you head uphill towards massive views of the valleys from the saddle between the mountain peaks. From this point you descend steeply until you enter a valley. Here you have an option to continue along the gentle valley gradient for the last kilometres to the rifugio or you can split off to the left towards an uphill towards a rocky saddle. You gain about 350m of elevation before you come up to the highest point. You now need to descend relatively sharply (but it’s along zigzags so still doable for the knees). You’ll soon be rewarded by views of the lake – Lagazuoisee.
From here it’s another steep downhill along a spring until you reach Rifugio Scotoni.
At the rifugio you can pay for a full dinner or order a la carte. The food wasn’t fantastic but it does the job of refuelling you. Your overnight stay should have breakfast included – it was an extensive breakfast with a selection of meats, cheeses, yogurt, cereals, and bread. The room had bunk beds but there was still some room to move around as compared to the other rifugios later on. Fresh linens are also provided. You can drink the water here from the taps.
Day 3: Rifugio Scotoni to Rifugio Scoiattoli
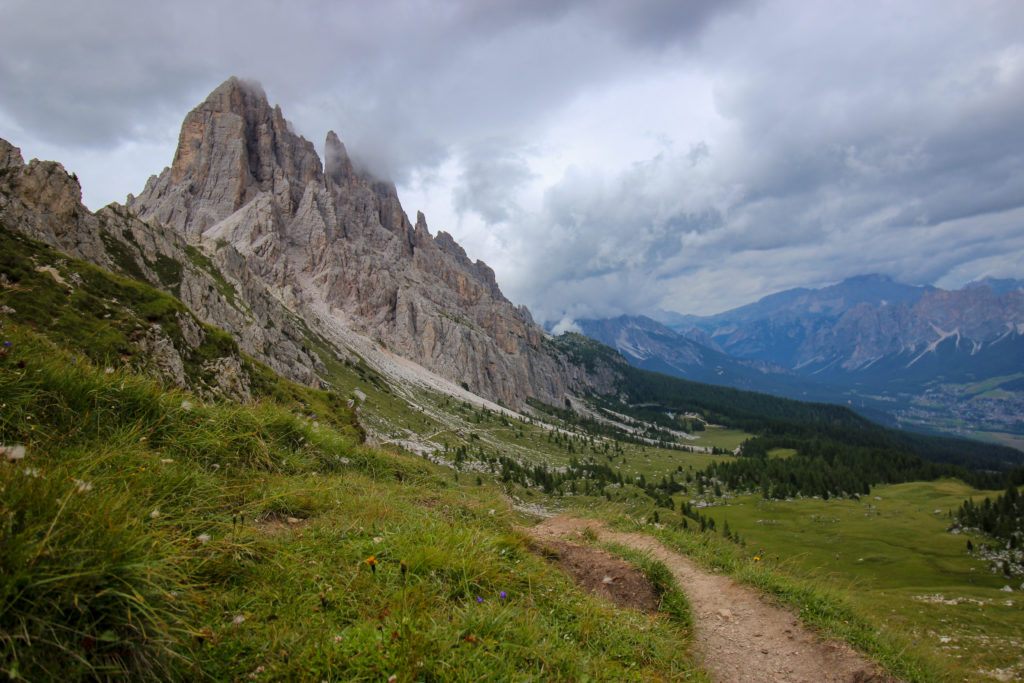
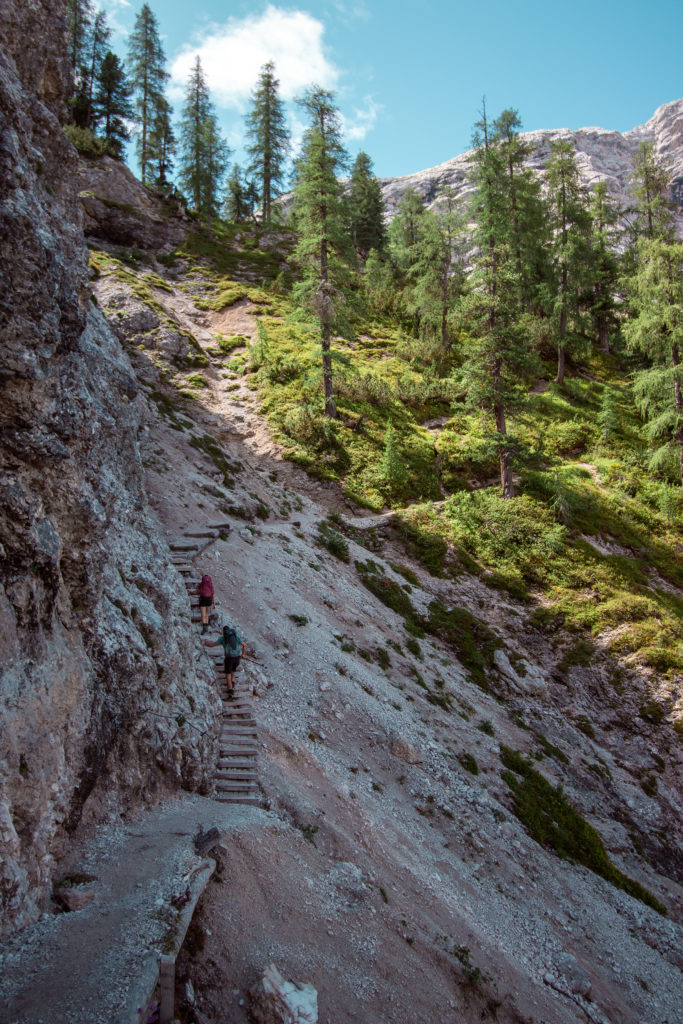
The day starts off immediately with a long ascent. Once again, you’ll be rewarded with epic views. Eventually you’ll enter a rocky path and notice ski slopes around you as you gradually ascend towards the saddle with a rifugio on the peak toward your right.

You might notice here a bunch of manmade looking caves. These are WWI bunkers. There’s quite a bit of barbed wire and other rusting metal around the sites as well. After descending from the saddle along a wide path you’ll enter a narrower path to your left to enter a grassy, rocky valley with a wide view of a mountain valley to your left. This is a great lunch spot since it’s quite protected from the wind. From here you’ll rejoin a wide path and continue your descent towards a road crossing. You’ll pass a spring along the descent where you should refill your water – it’s the last point until you reach the rifugio.
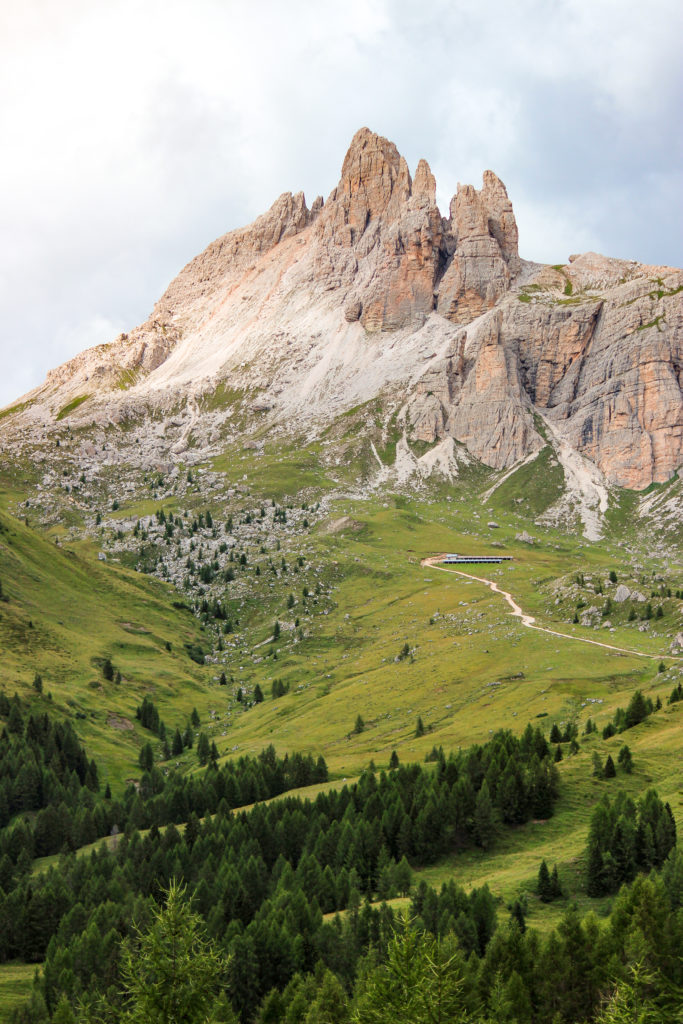
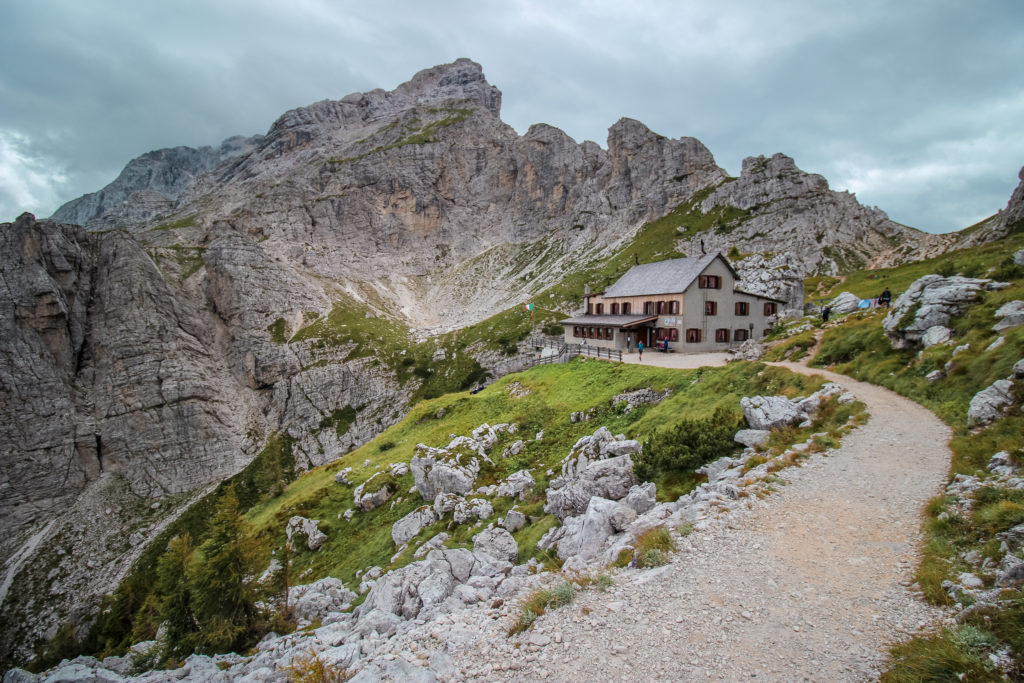
The last stretch of the hike takes you up 300m of elevation gain through forests and dramatic views before you come to Rifugio Scoiattoli.
Due to a ski lift, there are a lot of day visitors around but it clears out quickly since the last ride down is at 17:00. If you have extra time, check out the WWI bunkers next door to the rifugio. There are helpful information boards to take you through the history of that site.
The rifugio itself was not the worst we stayed at. However, the rooms are very tight with not much room for multiple people to move around or unpack bags. Fresh linens were provided. Bathrooms were shared and relatively tight but clean. The breakfast buffet was extensive and the dinner was well made a filling (three course meal). You couldn’t drink the water from the taps – bottled water was available for €3 for a litre.
Day 4: Rifugio Scoiattoli to Rifugio Fiume
Day 4 features a lot of up and downhills, but the views today can give Day 1 a run for its money.
The day starts off with a descent (you can optionally detour lightly to head past a spring and refill your water). The path gets a bit crumbly (but never dangerous) but then it evens out. You’ll eventually turn a corner and see Berghotel Passo Giau below. As you pass the hotel turn around to look back at Monte Ragusela – the peak is jarring.
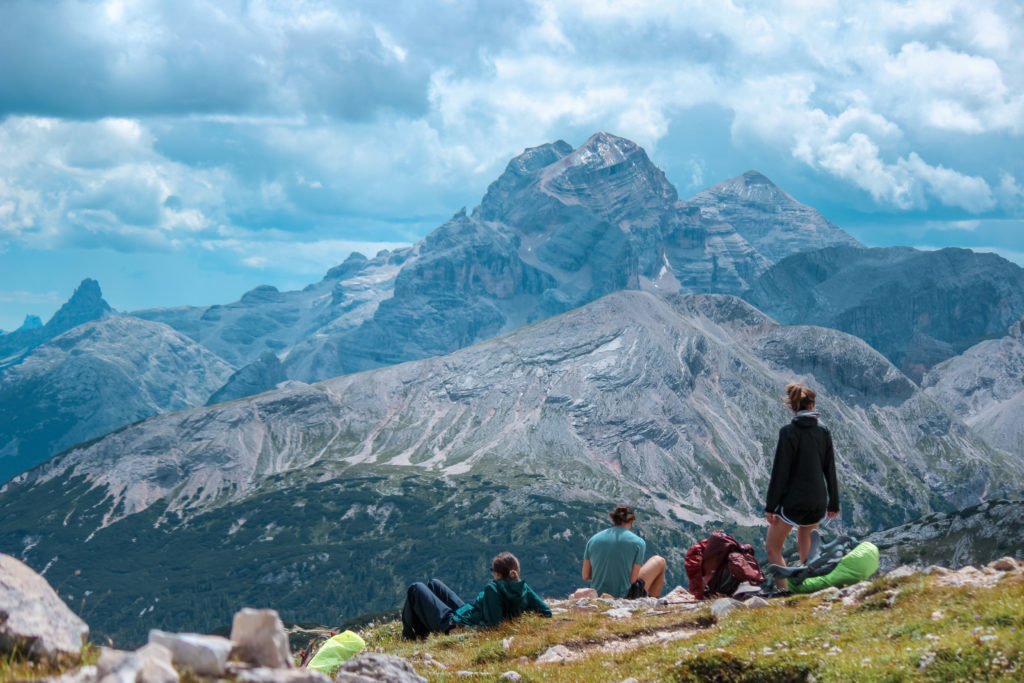
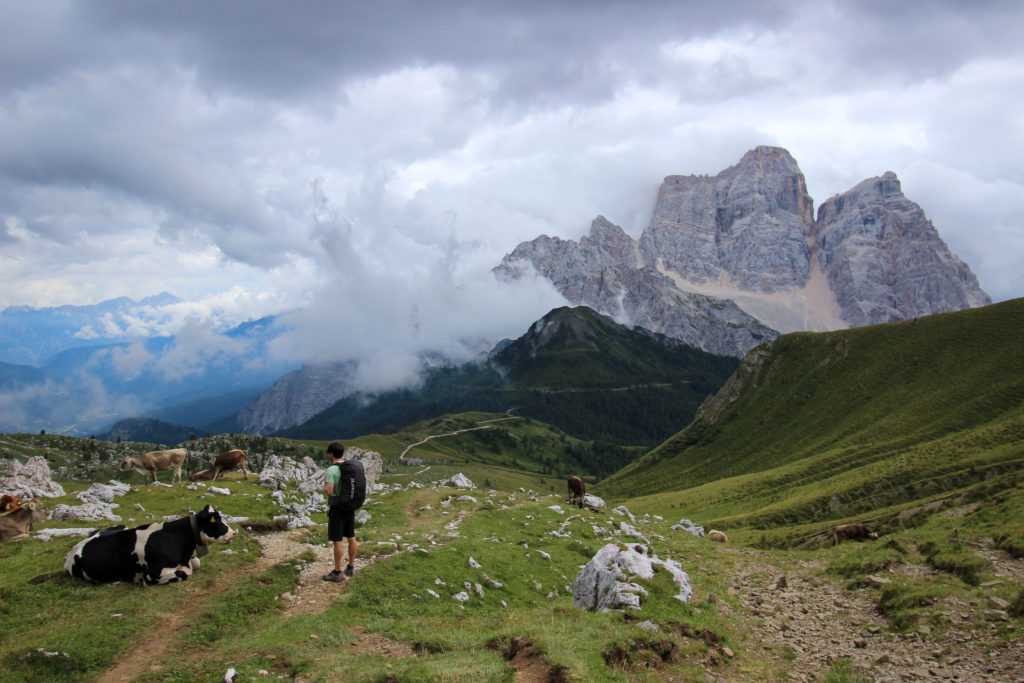
You’ll cross the road and head along a trail that hugs a mountain side (with views of another valley) before you descend a bit. Now comes a very steep uphill march. But once you reach the top you will see a little pond and a wide grassy space with a 3000m+ mountain peak jutting out in the distance.

The last part of the hike follows through this grassy area before heading back up to a rocky mountain side. Finally you descend through a field of cows onto a wide path that brings you to Rifugio Città di Fiume.
This was probably the worst rifugio we stayed at. The space is very cramped and you can’t be sure of what you’ll get. This rifugio also opened up very late for bookings – in March only. It has 4 rooms that sleep a total of 20 people. The dinner was mediocre at best (opt for the veggie strudel if they have it). Breakfast was sparse and the owner was reluctant to refill (even though he only put out a single 1L bottle of water for 20 guests). You need a sleeping bag liner or otherwise you need to pay for a disposable one (€5). Keep this for the rest of the trip. You’ll also need to pay for hot water for the shower (€3.50). The water is non-potable so refill along the trail at springs before heading here.
Day 5: Rifugio Fiume to Rifugio Coldai
Day 5 has one downhill and the uphill is at the very end towards the rifugio. The day starts off with a long walk through the woods. At once point you have the option to deviate uphill (100m ascent) to dinosaur track fossils. If you have the time, I’d recommend checking it out. From here, you’ll continue on the trail before descending downhill to cross the road.
The trail then follows a wide jeep track upwards until you get to a sheperd’s house. Refill your water at the spring here before making the final ascent up to Coldai. The last bit is rocky but if you follow the zigzags you can mitigate the steepness.
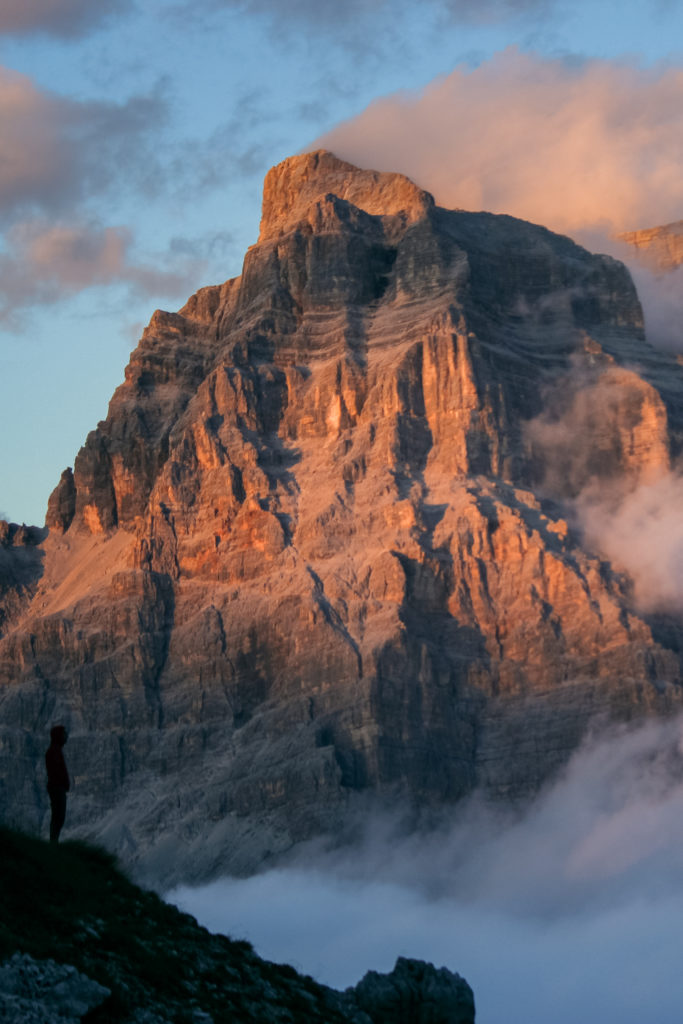
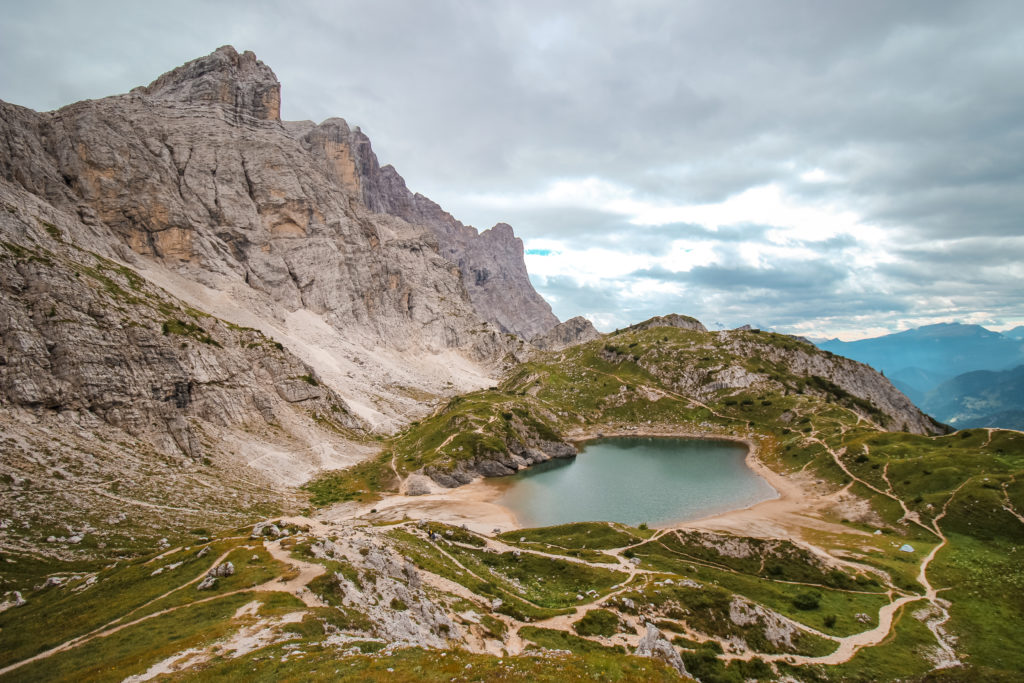
Rifugio Adolfo Sonino Al Coldai is near the top of the saddle at looks out at views of the valley with massive rock faces surrounding it. With extra time, head up to the saddle for evening views of the lake and to head to the peak of Coldai.
The rifugio was one of the nicest rustic ones we stayed at. You still needed your own bed liners since they do not wash the sheets. However, there are multiple bathrooms. The rifugio itself can accommodate 93 people in its rooms (most being 4-bed rooms). The dinner was extremely filling and very well made (go for chips and cutlet). The breakfast buffet was also plentiful. Showers cost €5 for a 6 minute shower (no cold shower was available without paying).
Day 6: Rifugio Coldai to Rifugio Carestiato
Of all the days, this was the hardest. It’s full of descents and ascents and just plain long. It’s also one of the days with the least other people on the trails as the route is relatively inaccessible to day hikers.
The day starts off nicely with a view of the lake as you walk around it. You’ll then walk in the shadow of rocky mountain peaks through a rocky mountain face before you descend into a grassy valley with sheep and goats. At one point, you’ll enter a road that heads down to Rifugio Mario Vazzoler. The drinks and food here are reasonably priced and there are restrooms to use.

From here the path steeply descends and then steeply ascends into a forest. The ascent is never ending brutal slog. While some parts are shaded most are fully in the sun and require scrambling at times. Finally when you reach a saddle at the end of a grassy slope, you have about 2.5km ahead of you along a contour path to the Rifugio Carestiato.
The rifugio was one of the more affordable to stay at. It’s at the base of a massive via ferrata route if you have the equipment and want to give that a try. You’ll need a sleeping liner here and showers cost €1 for 2 minutes of hot water. The dinner was very well made and filling (though not as massive portions as at Coldai). The breakfast was also plentiful.
Alternative Route
If you want to take the path less travelled and take on a bit more elevation gain for the day, you can take a different route to Rifugio Carestiato. Instead of heading up the saddle from Coldai, you would head on the path to the left following the rocky contour path along the mountain slope. That path eventually leads to one on your right that takes you up and through a mountain pass back towards the Alta Via 1. The route ranges from T1 to T3 level hiking paths. However, it adds about 400m of elevation gain to the day.
Day 7: Rifugio Carestiato to Agordo
The final day is a gentle slog down to Agordo. Of course you can continue for another two to three days hiking along the route to the official end in Belluno, but if you’ve only got a week to hike, then Agordo it probably is.
The hike is nothing special – you start off on a steep forest path and then you need to walk along the road for most of the way. You can deviate to a route (like we did in the maps linked) that takes you off the road and onto a very very old cobblestone-type of road down into the town.
From Agordo, you can catch the 001 Dolomiti bus to Belluno for 5.40€ (cash). Tickets are available to purchase on the bus. From there, you can get a train to your next destination (in our case a train to Venice and then onwards to Bergamo.) Double check times before you hike as services can be infrequent.
Staying at Rifugios
Rifugios are basic accommodation for hikers scattered across the Dolomites. They often have bunk beds and shared bathrooms. Those with less accessible water sources tend to restrict water usage by charging for showers. They also do not wash the linens so you will need to bring at least a sleeping liner (or purchase one). However, they do have pillows and blankets.
Some rifugios do not provide towels, so it’s always a good idea to have one with you.
All rifugios at lower altitudes (roughly 2000m and those we stayed at) provide food and drinks. Accommodation rates often are for half board – they include breakfast and a three-course dinner.
Water is not always potable at the rifugio. You might need to buy water if you don’t refill up enough at springs along the route. Otherwise if you have a steripen, that can do the trick.
Rifugios can book out quickly so it’s best to make your bookings all in January before the summer hiking season. As a solo hiker, you might get last minute beds, but as a group you’ll need to book in advance to get a room to yourselves.
Practicalities
Water along the route
There are springs along the route where you can safely refill your bottle. You can also refill at the tap at some of the rifugios.
It’s best to have bottles to hold at least 2L of water and refill where you can.
What to pack
You’ll want to keep your pack light. The basics you need are hiking shoes, hiking clothes (one to two sets, rinse along the way), a quick dry towel, and Nalgene water bottles.
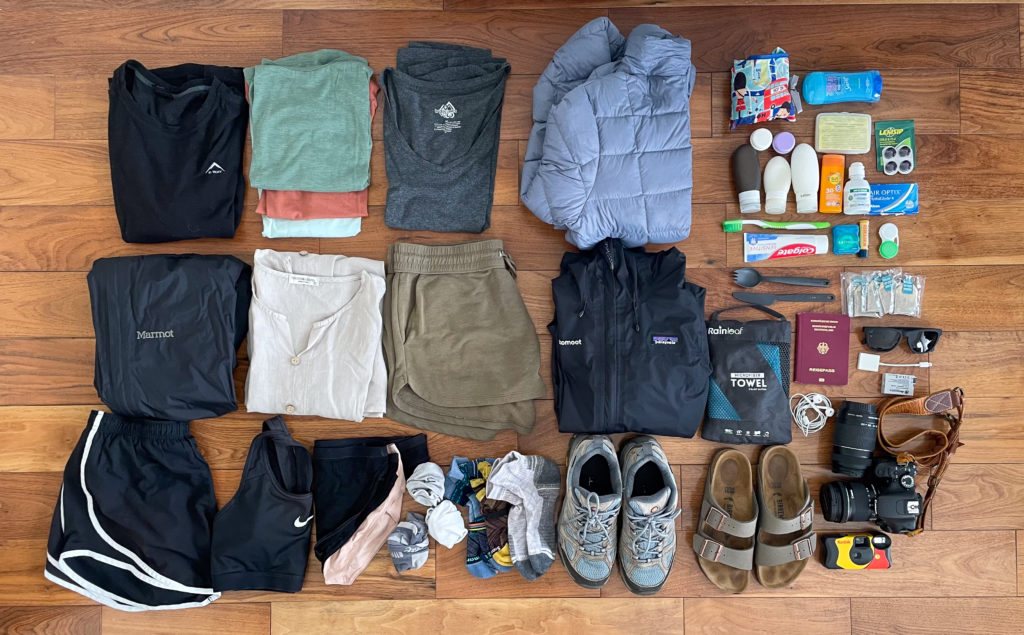
If you’re a light sleeper, earplugs or a sleep headband that you can play white noise through are game changers.
The high altitude means you are exposed to a lot of sun and wind so you will want sunscreen even for cloudy days. Lip balm with SPF will also help.
When we went in august we experienced hail, rain and blistering hot days – a wide range of weather conditions. Having a rain coat (or poncho), waterproof shoes, a warm down jacket and long pants can be a lifesaver in the cold conditions. A hat and sunglasses will come in handy on the sunny days.
Do I need cash?
All the rifugios accept card payments but it might be smart to bring €200 in cash in the case of an emergency.
Is there WiFi?
Most rifugios do not have WiFi. You can access the internet through mobile data but the reception is often weak or non-existent. If you are using mobile trail maps make sure to download offline versions before you head off.
How much should I budget?
Budget at least €65 per person per night if you are going on a shoe-string budget. At a minimum you will pay this much for a bed and breakfast and often dinner, especially on the southern parts of the route. At the northern parts you might need to pay more.
We spent between €110 and 65 a night depending on the place we managed to secure a booking at. Often you will want to budget more for drinks and a light meal (like cake) along the way. Tokens for hot showers and sleeping liners can also add to your bill.
Realistically, you should budget closer to €90 a person per day. This doesn’t include the transport to and from the trail start or accommodation the night before the hike.
Food along the way
Plenty of breakfast and dinner is available at the rifugios. You can often order a packed lunch if you want.
We brought our own food. We had granola bars (one per day), gummies (500g), chocolate bars (500g), vacuum sealed bread (1.5kg), and a jar of peanut butter. However you can also just grab bread and some jam packets each morning from breakfast and bring those along instead if you want.
Dinner at the rifugios is often served from 19:00-20:00 so you will need to arrive in time to eat. Breakfast is usually served from 7:00 to 8:00.
When to go?
To avoid adverse weather conditions, July to mid-September is the best time to hike the Alta Via 1.
We went in early August and had a mix of weather. Most days it was extremely cold – the days started off at 2C and went up to about 11C. The last days were so hot and sunny you could feel the sweat rolling. Luckily we had very little rain or thunderstorms, but that could easily also have been the case in August.

Alternative Hiking Trips
If you like the look of the Dolomites, but don’t want to splurge on the rifugios, the Albanian Alps have the same geological makeup as the Dolomites but for a fraction of the price. The Albanian Alps also see far less foot traffic – you won’t be all alone, but you won’t feel like you are hiking with the entire country either. You can hike the Peak of the Balkans trail if you want an intense multi-day hike, or alternatively do day hikes like we did when we went to Albania.